Project story · New construction
From drywall corrections to a painted interior
This new-construction project brought drywall correction and painting together. Light walls, deep accent areas and a detailed ceiling define the painted result. Follow the same main room from preparation to paint, then look closer at the finish.
The transformation
The same room.
Two stages.
The same main room before painting and after the painted finish. Original camera positions and lighting are retained; tools and construction details remain visible.
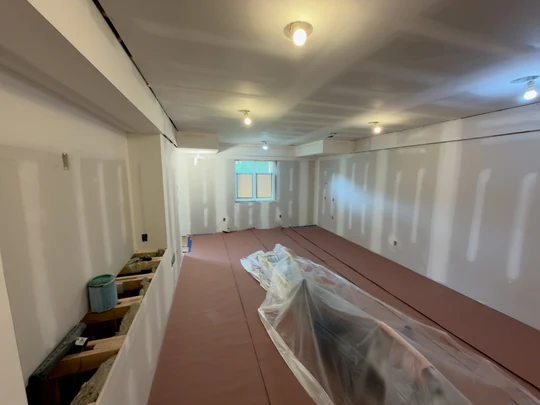
Drywall seams and preparation patches in the main room, photographed before painting.
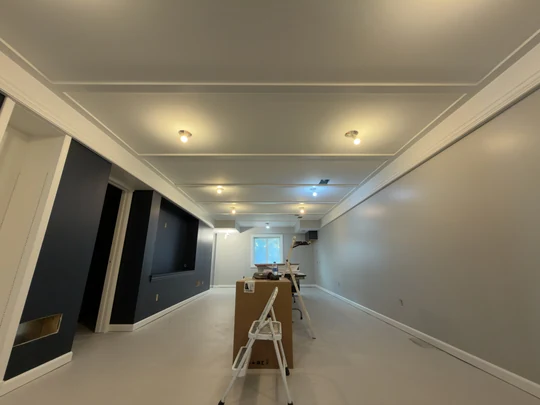
The same main room after painting, with light walls, dark accent areas and a painted ceiling.
Actual project photographs. Camera position, field of view and lighting differ. Select a photograph to see its full frame.
The preparation comes first
The earlier main-room photograph shows drywall seams and preparation patches before painting. QOQ’s work on this new-construction interior included drywall corrections followed by painting.
The matched later photograph shows painted walls and ceiling, contrasting dark areas and light trim. The long room and far window make the two stages easy to follow, while the different camera positions remain visible.
A painted finish, honestly shown
The photographs document the painted surfaces, not a claim that every part of the construction was complete. Temporary lighting, tools, floor protection and unfinished surrounding details remain in view.
The additional photographs are other views of this same project’s painted interior. They are not presented as separate before-and-after matches. No retouching or AI color changes are used in these project photographs.
Plan the surfaces, not just the color
For a similar project, show QOQ the wall and ceiling conditions as well as the finish you have in mind. A clear scope helps connect the preparation to the painting.
- Identify drywall concerns, patches and joints that need review.
- List walls, ceilings, accent areas and trim separately.
- Explain access, construction sequencing and the surfaces that need protection.
The painted result
A closer look
at the finish.
Additional views of the painted interior from the same project, not separate before-and-after matches.
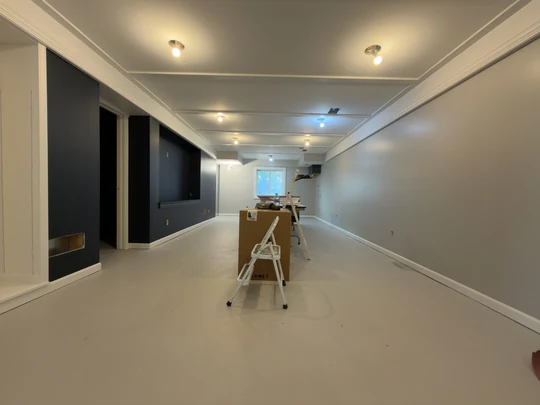
Another view of the main room’s painted surfaces. Tools and temporary lighting remain visible.
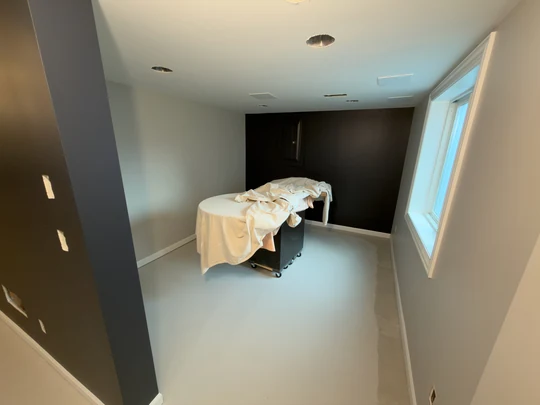
A separate room in the same project, with painted walls and ceiling. Protection and unfinished fixture openings remain visible; this is not another before-and-after match.
Your project.
A clear next step.
Share a few photos, the surfaces you want included and your project city or ZIP. QOQ will review the condition and scope with you.
Discuss drywall and painting