Follow the wall across the photographs
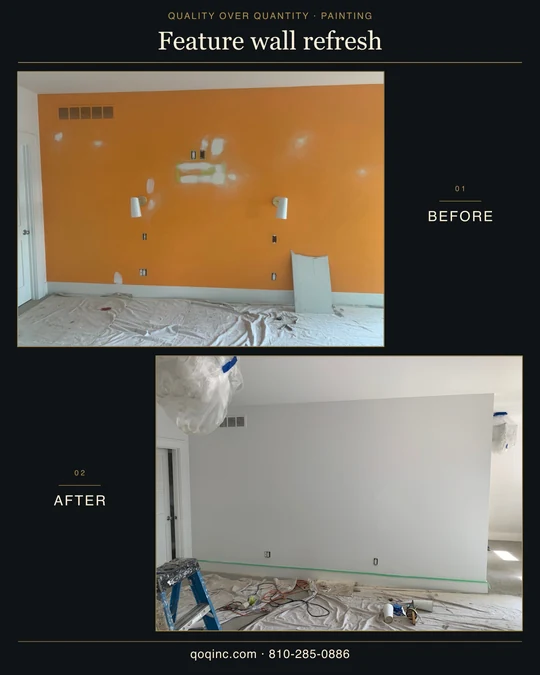
A high wall vent and the opening at the left help orient the two views. In the first photograph, patches and open fixture or electrical areas interrupt the orange paint. In the later view, the wall reads as a pale, continuous surface, with floor covering, a ladder and tools still in the room.
Those surrounding details remain in the comparison because the photographed result is the wall finish. They also show why a paint result can be ready to view while other parts of a room are still in progress.
Describe the repairs before choosing the final look
For your own feature wall, take one photograph of the entire surface and closer views of patches, holes or damaged areas. Include the points where the wall meets the ceiling, base trim and adjacent openings. This makes it easier to discuss the surface condition and the extent of preparation instead of treating the work as a color change alone.
- Show existing repairs in ordinary room lighting, including any areas that look different from the surrounding wall.
- Explain which wall openings, fixtures or trim will remain and which are part of a separate project.
- Clarify whether the estimate includes only the feature wall or the adjoining surfaces as well.
Choose the lighter direction in the room
The move from orange to a light neutral changes the contrast around the wall openings and surrounding finishes. A photograph can help you describe that direction, but a screen is not a reliable way to identify an exact paint formula. Compare physical samples beside the finishes that will stay.
Bring your wall photos and a short list of the areas that need attention to the estimate conversation. QOQ can review the actual surface and scope before confirming the painting plan.